Introduction
Over the years, laser engraving has brought tremendous progress to several industries, including the world of wood. Lumber has found even more relevance to many aspects of our lives with the advent of laser engraving. In fact, different patterns, including photos, can now be engraved onto wood surfaces. This technique can be trickier than your standard lettering, so we’re giving you six professional tips about how to laser engrave images on wood. With a little trial and error, you’ll be able to tackle any task related to laser engraved photos on wood.
6 Things to Heavily Consider
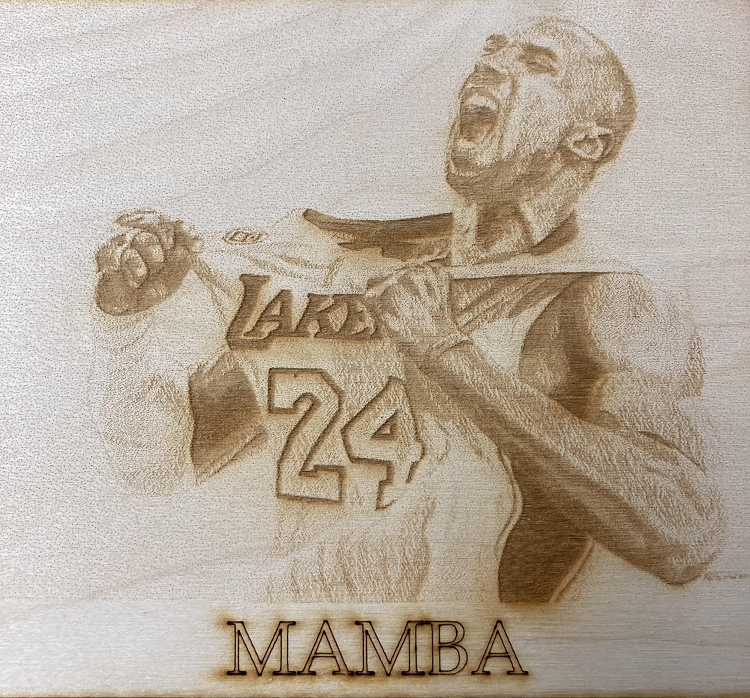
- Nature of Wood: Nature produces many different types of wood with varying and peculiar characteristics. Furthermore, the choice of timber is imperative when you want to laser engrave wood. One of the traits to look out for is color. Bear in mind that with light-colored woods, the outcome of laser engraving is usually more aesthetically appealing. Thus, if you desire to engrave a visually-appealing design, you should consider lighter woods such as Maple and Cherry.
Another feature of timber to look out for is the wood density. You will need more laser power to engrave on denser woods. For example, softwoods will need less laser power than hardwoods. It is therefore imperative to know the wood density of a specific type of wood.
Some woods have relatively smaller grains compared to others. For instance, Alder, Cherry, and Walnut have smaller grains and therefore produce neater engraving compared to Oaks, which have larger grains and do not give super results. Maple, Cherry, and Alder are mostly used because their grains work in alignment with laser engravers.
- Choice of Artwork: The artwork you choose dramatically determines the outcome of your engravings. According to several theories, stunning engravings result from using photos with various shading that transcends from light to dark. Conversely, images with a block of solid color do not produce optimal results, especially on lumber. Avoid photos with massive backgrounds with just one or two tiny pictures on it. These photos have very little detail, which is a major factor to consider in photo laser engraving.
- Choice of Software: Your choice of photo editing software plays a significant role in photo laser engraving. Most graphic software enables the adjustment of digital or scanned photos. However, some of them are built with extra features that make photo edits easier with better results. Examples of the go-to software programs are LightBurn and CorelDRAW. Some features include resizing an image, sharpening edges, adjusting brightness, and adding texture and lighting effects.
- Wood Color Filling: To achieve a more profound contrast on the final product, you can color fill the engraving on the wood so that your engraved item looks more aesthetically pleasing. The color filling should not be done on wood if not needed. For laser engraved photos on wood, lighter woods produce aesthetically appealing results, so they do not need to be color filled. On the other hand, dark woods, e.g., walnut, will be much more visually appealing with color filling.
- Photo Settings: It is essential to adjust the photo settings from time to time during laser engraving. The smallest changes in the photo settings could make a massive difference in your final result. For instance, adjusting the tone contrast from dark and light areas on the photo gives it a softer or sharper effect. These gradual changes will have the same impact on your final product. Therefore, it is vital to test the photo setting on your image whenever you make the slightest adjustment.
- Photo Scanning: Scanned images are easier to work with when making laser engraved photos on wood. Hence, it is advisable to scan your pictures in colored form, even if the original copies are black and white. This added information from the Color gives you an edge when you are preparing the image.
- Use of Appropriate Resolution: Determining the right resolution to make in engraving a photo on wood makes the work easier and produces a better result. For instance, if your image has an extensive solid colored background but a varied foreground that would engrave well, replace the background with a transparent layer in your photo editing software.
- Always Practice: Frequent practice makes you better at anything. The same goes for laser engraving photos on wood. It’s all about trial and error, and you get better results every time you do it.
Conclusion
We hope you understand a bit more about how to laser engrave photos on wood. Soon you’ll be able to produce perfect ad quality works for all your clients. Remember, at OMTech, you get the best user-friendly laser engraving machines that are easy to use and affordable to purchase. Do not hesitate to work with them on your next project to get the best results possible.